Why My Lips Looked Nothing Like That Photo
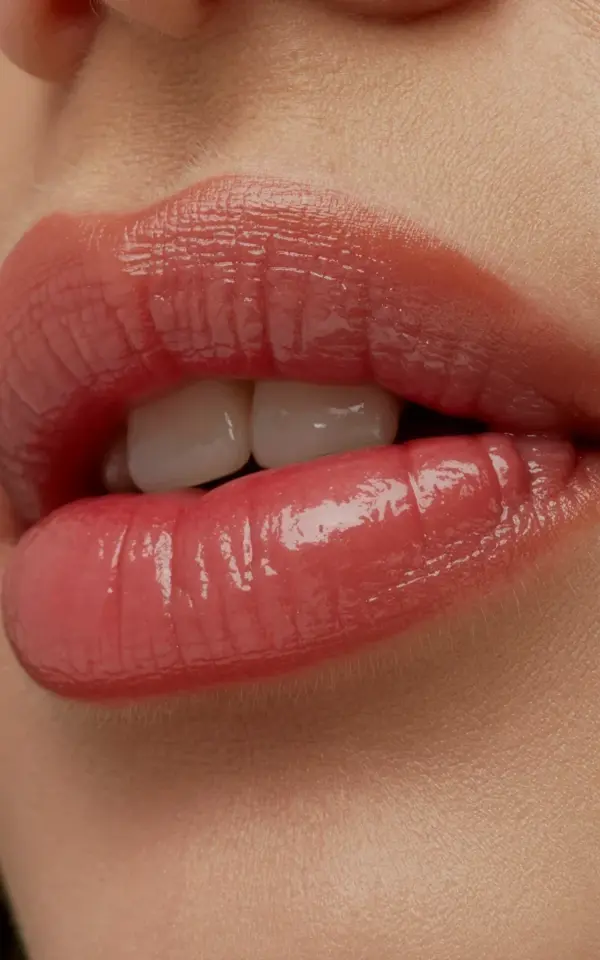
My lip transformation did not happen overnight. I mean, look at that close up above. The smooth texture, the high shine, the way the coral pink fades from deeper at the corners to lighter in the center. That took work. Honestly, six months ago my lips were a dry, flaky mess. I had this bad habit of picking at the peeling skin, which made everything worse. And then I discovered that a simple routine could turn things around completely. If you are starting from scratch with zero knowledge about lip care, you are in the right place. I will walk you through everything I learned, including the exact products and steps I use to achieve that glossy plump lips look.
Why My Lips Were Always Dry and Cracked
I live in a place where winter heating sucks every drop of moisture out of the air. Not gonna lie, my lips used to feel like sandpaper by noon. I tried drinking more water (eight glasses, yes, I counted) and it helped a little but not enough. The real problem was that I never exfoliated. I would slather on balm over dead skin, and that just sealed the flakes in. Gross, right? Here is the thing: your lips need gentle exfoliation to get rid of those dry patches, otherwise no balm or gloss will look smooth. It is like trying to paint a bumpy wall. Ok so, the first step was admitting I needed to scrub, not just moisturize.
The DIY Brown Sugar Scrub That Changed Everything
I was skeptical about making my own scrub. I thought, why bother when I can buy a tube? But store bought scrubs often have those plastic microbeads that are bad for the environment and honestly too harsh for your lips. So I grabbed what I had in the kitchen: brown sugar, honey, and a drop of olive oil. That is it. Three ingredients. Here is how I do it:
- One teaspoon of brown sugar (fine, not the coarse raw kind because that hurts).
- Half a teaspoon of honey. I use the runny kind from a bear bottle because that is what I have, but any honey works.
- Mix it with a few drops of olive oil until it feels like wet sand. Not too runny, not too dry.
I apply a small amount to my lips and gently rub in tiny circles for about thirty seconds. Not longer. Seriously, do not overdo it. Then I rinse with lukewarm water. The result is lips that feel soft but not raw. I do this twice a week, no more. Over exfoliating can cause irritation and make things worse.
How I Hydrate Without Getting That Sticky Feeling
After exfoliation, your lips are like a clean canvas. They are ready to drink up moisture. I used to think any old lip balm would do, but I was wrong. Some balms just sit on top and feel greasy. Others contain ingredients like menthol or camphor that actually dry out your lips over time (I learned that the hard way after buying a minty one that burned). My favorite is a simple shea butter based balm with no fragrance. I pat it on while my lips are still slightly damp from rinsing. That locks in hydration better. Then I wait a minute or two before moving on to the next step. Patience is boring, I know, but it pays off.
My Go To Matte Coral Pink Lipstick and Why It Works
Here is an unexpected trick: I apply a matte lipstick even though we are going for glossy plump lips. Why? Because matte gives the color staying power and a solid base for the gloss. The shade I use is a coral pink that is not too bright and not too nude. In the photo you can see how the color shifts from deeper at the corners to lighter in the center. That is partly the lipstick fading naturally over time, but I also blot the center with a tissue after applying. That little step creates a subtle ombre effect that makes lips look fuller.
I swipe the lipstick on starting from the outer edges and blend inward with my finger. No lipliner needed, I am too lazy for that. The matte formula dries down fairly quickly, so I do not have to wait long. And here is the mildly weird detail: I bought this lipstick at a drugstore on a whim because the name was “Coral Kiss” and I liked the sound of it. It cost five dollars. You do not need expensive stuff for a good result.
The Clear Gloss Secret for That Light Reflecting Glow
Ok so, now the fun part. The clear gloss. I apply a thin layer over the matte lipstick, focusing on the center of the lips. That is where the light catches and gives the illusion of plumpness. I used to slather gloss all over, but it made my lips look like a wet doughnut, not cute. A little goes a long way. My favorite clear gloss has a doe foot applicator and smells faintly of vanilla. Not gonna lie, I sometimes add an extra dab right on the cupid’s bow (the little dip above your top lip) because it reflects light and makes the lip line look sharper.
One time I tried a gloss that had shimmer particles in it. Big mistake. It looked like glitter glue from a craft project. Stick to clear, high shine formulas that are not sticky. If you hate the tacky feeling, look for glosses labeled “non-sticky” or “oil based.” I have one from a brand called Lip Love that I found at a discount store, and it works perfectly.
My Before and After Lip Transformation in Real Life
Let me be honest with you. When I started this routine, the first two weeks showed barely any difference. I felt like quitting. But I kept at it, and around week three my lips stopped peeling altogether. The color from my lipstick looked more even. And the gloss actually stayed smooth instead of settling into cracks. I took a before photo on my phone and compared it to the after photo you see here. The difference was subtle but real: less flakiness, more even tone, better shine. That is what a consistent lip care routine can do, even if you have zero experience.
My biggest advice? Start small. Do not buy ten products at once. Just make the brown sugar scrub, use a gentle balm, and top with a drugstore gloss. Try it for a month and see. I promise you will notice something change. And when people ask what lip product you are using, you can smile and say, “It is just my routine.”
I would love to hear how it goes for you. What lip balm do you swear by? Or if you try the scrub, let me know if you accidentally get honey in your hair like I did once. (That was a sticky mess.) Drop a comment below if you want more beginner friendly tips.
#lip transformation #lip care routine #glossy lips #plump lips #before and after
Leave a Comment